

Imagine you have an eCommerce business, and every time you receive an order, you need to manually send it to the inventory management, accounting, sales, and customer support. It sounds like a lot of work, doesn’t it?
Well, it should not be. This is where an integration platform like Zoho Flow comes in.
Zoho Flow helps you handle different business processes, like marketing, sales, HR, and project management.
Read on to find out everything you need to know about how Zoho Flow makes your life easier.
Contents
What is Zoho Flow?
Zoho Flow is an integration platform that connects different cloud applications. It is used to create workflows to automate the exchange of data among the applications you use.
In a digitized world like ours, multiple different applications are needed to manage the different business processes. To handle all the apps and ensure that they communicate and exchange information on time, we need an integration platform like Zoho Flow.
Example: You can create a flow where a message is sent on Slack whenever you receive an order on your Zoho mail. All you need to do is create a connection with the Slack and Zoho mail app.
Why is it necessary?
For years, the alternative was to hire a developer to integrate these applications, but with Zoho Flow, you can save both time and money. You can execute a complex business process and automate various routine tasks without using any code.
It eliminates the need for manually transforming and transferring data to different applications. Zoho Flow has more than 500 apps that can be integrated.
How does Zoho Flow work?
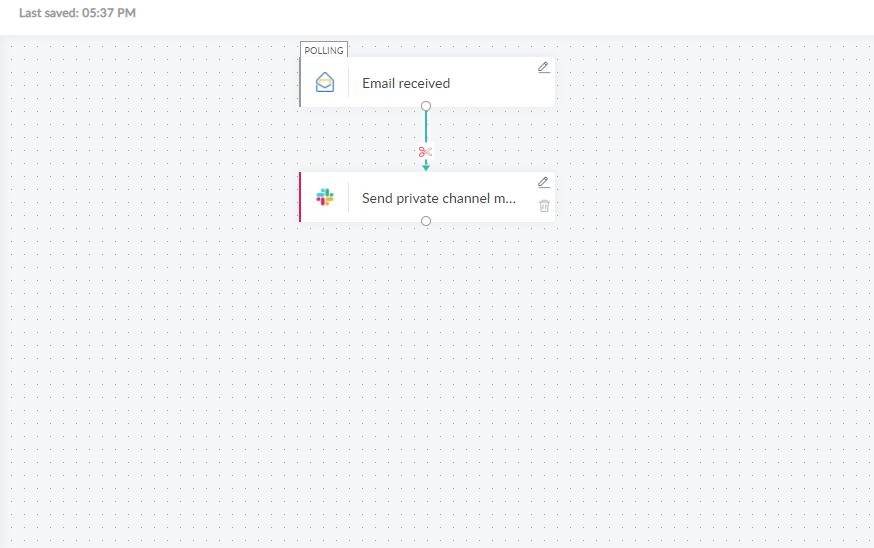
At the center of an integration platform like Zoho Flow is a workflow engine. A trigger and an action(s) combine to make a flow.
A trigger is like a sparkplug for the flow. It kickstarts it. A trigger can be an App (event in an app), Webhook (data received from an app through a unique webhook URL), or Schedule (a predefined time). It leads to the actions in the workflow.
The actions are the tasks that are executed as a part of the flow after the trigger. You can have more than one action in a workflow.
For example, whenever a new Google form is filled, it updates the Zoho CRM app’s contact information. Here a Google form being filled is the trigger, and updating the contact information is the action.
You can automate tasks that are more complex using logic elements. Logic elements are used to set a variable, check for conditions, and take decisions, and delay executions.
You can learn more about the nitty-gritty of how an integration platform works here.
What are its features?
- Connect applications without any coding to ensure an uninterrupted flow of information.
- Work with your team members and coordinate with different departments to create better workflows.
- It has a drag and drop interface that makes it easy to build and edit connections easily.
- Zoho’s scripting language, Deluge, can be used to reformat data, add advanced decision trees, and add customized tasks to the flow.
- Maintain an entire history of your flows to track progress and identify errors as soon as possible.
- Study and analyze how your processes work using all the information provided on the dashboard.
- Use the pre-built workflows to get started and customize them to your needs.
How to get started on Zoho Flow?
1. Sign up for Zoho Flow with your email.
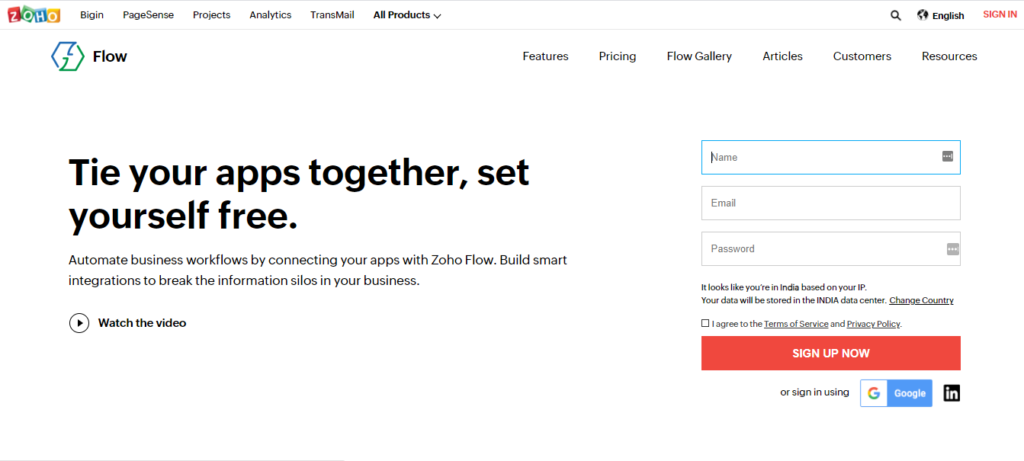
2. Fill in your organization’s name and your time zone and click “Create”.
You get a 14-day free trial, where you can test its features. After that, you will have two plans to choose from, Standard (500/month/org) and Professional (1250/month/org).
Note: If you have been invited to join Zoho Flow of an organization, click “Accept Invite” in your invitation mail.
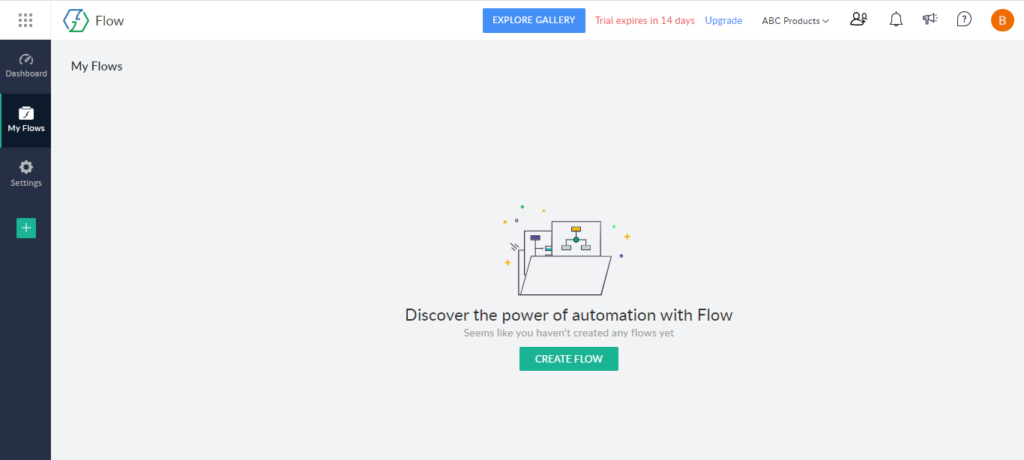
My flows: It is the first screen you see after you join Zoho Flow. You can view, copy, delete, and switch on and off flows here.
Builder: You build and edit your workflows here.
Summary: You can check all the stats of the selected flow like success rate, connected applications, etc.
History: It has the details of every execution of the selected flow. You can filter based on the time period.
Dashboard: The performance data of all the flows is visualized here. It also shows how many flows are live, paused, saved, etc.
Settings: Manage profile, history, connection, member, audit trail, and support access settings here.
How to create a flow?
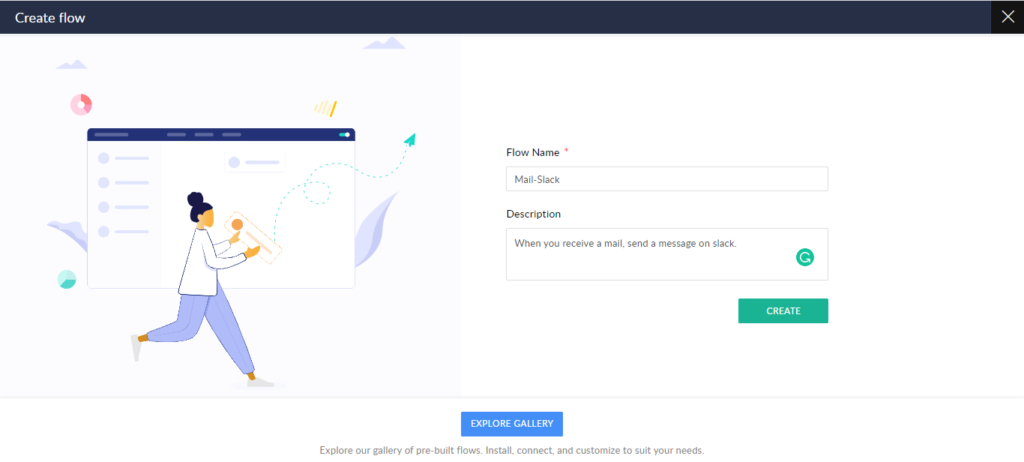
1. Click on “Create Flow” in the My flows section.
2. Add a flow name and description that is relevant.
Adding Triggers
1. Choose a trigger from App, Schedule, and Webhook.

2. If you chose App as the trigger, select the app you want to be the trigger.
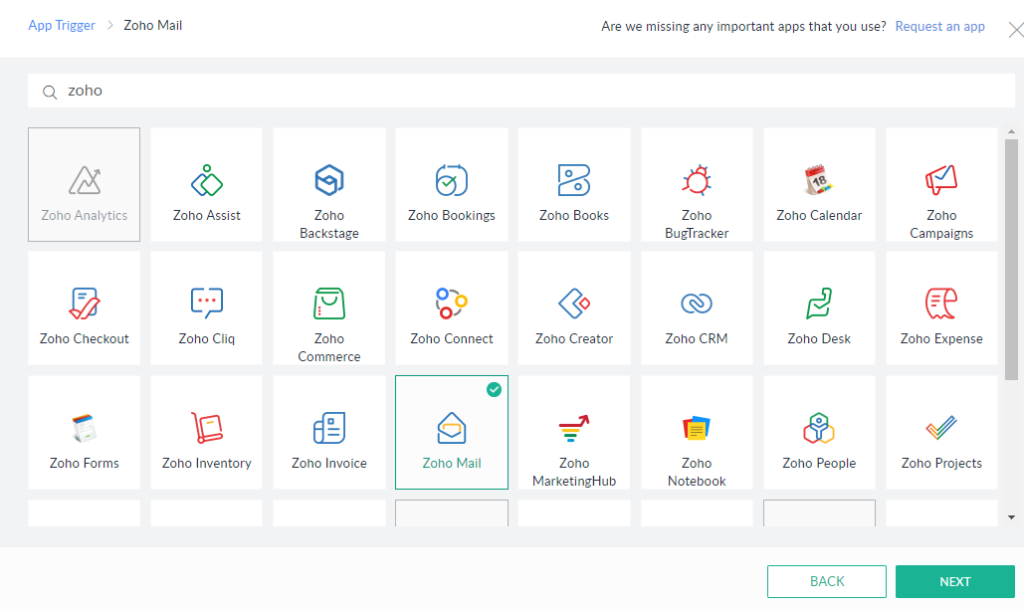
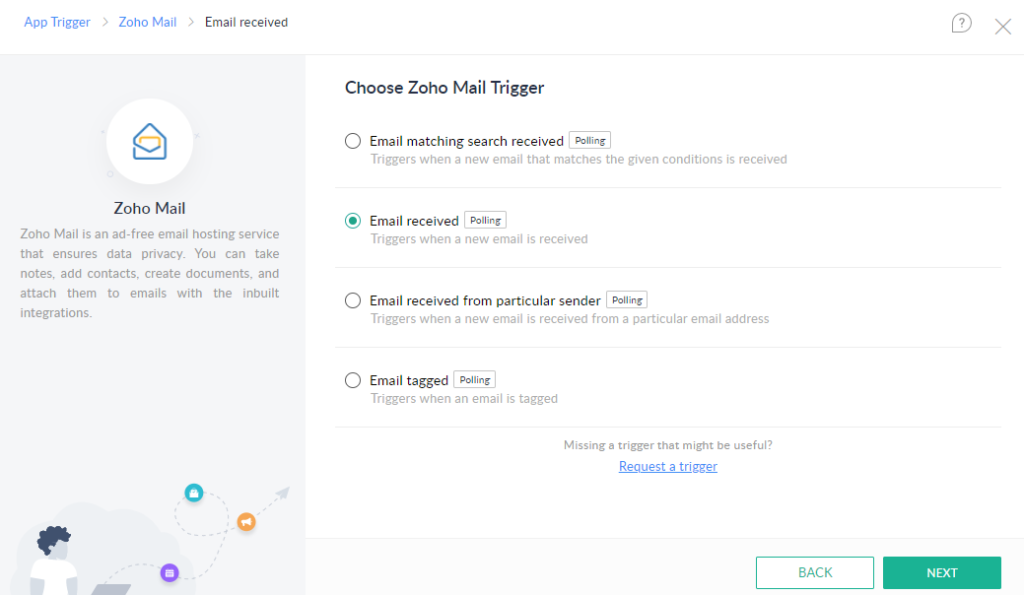
3. Chose the event in the app that you want to be the trigger, like receiving an email.
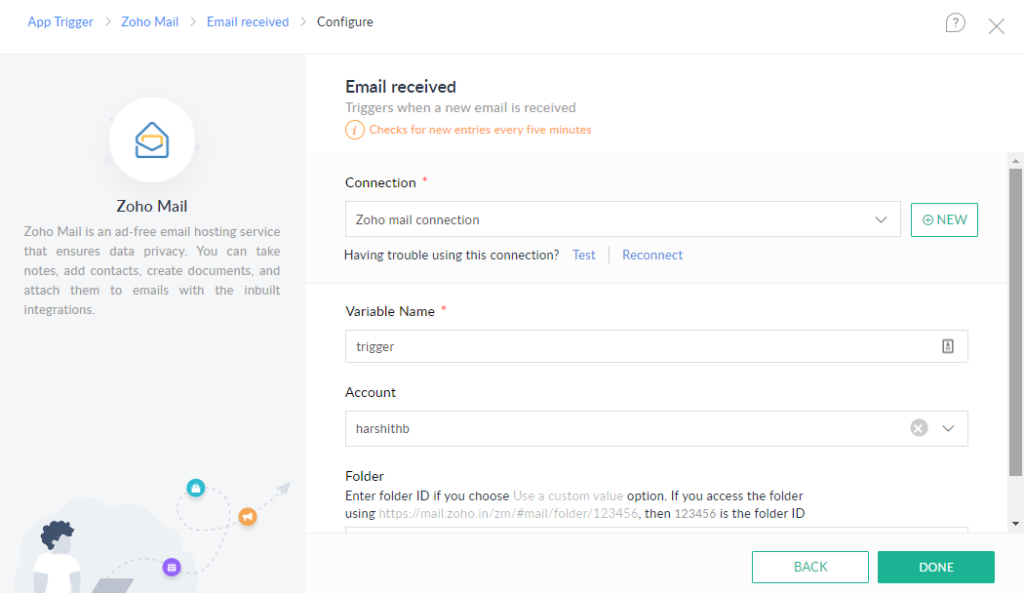
4. Create a connection with Zoho Flow to allow exchange of data.
5. If you already have a connection, you can also create a new one and give it a new name.
6. Give authorization to Zoho Flow, process varies for each app.
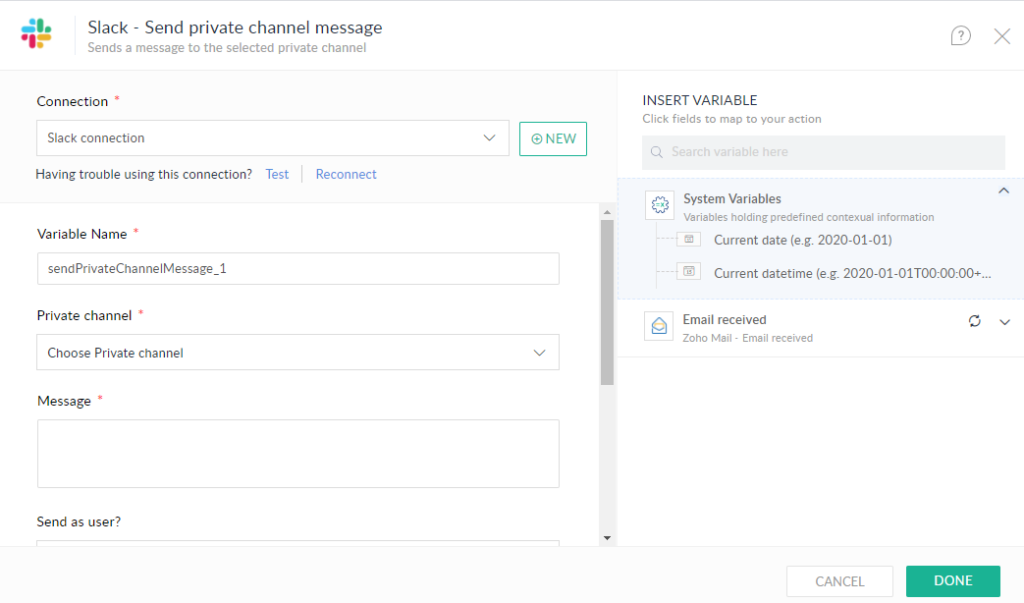
7. Enter the information required in the fields and click “Done” to create a trigger.
Adding App-Based Actions
1. Click “Apps” on the left corner to reveal actions available.
2. Drag and drop the chosen action based on when you want it to be executed.
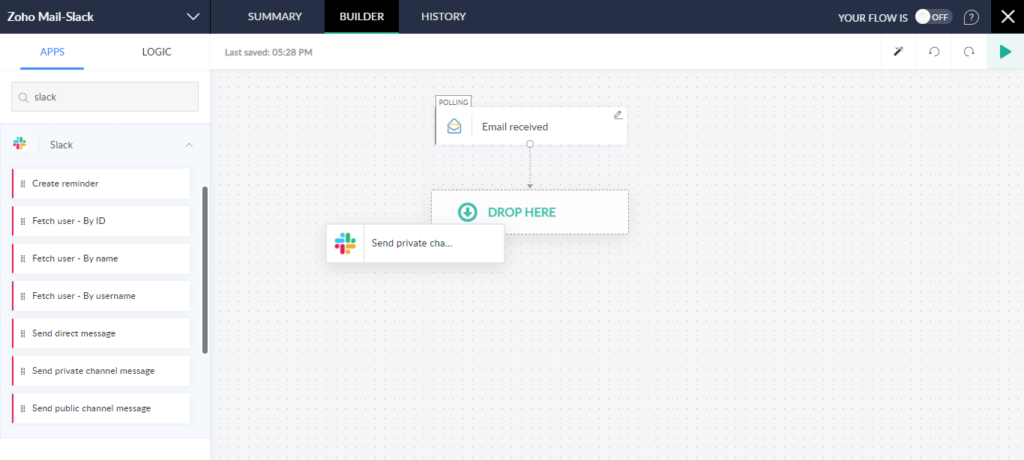
3. Create a connection with the app, if you haven’t already, and give authorization.
4. Enter the information required in the fields and click “Done” to create an action.
5. You can remove a link by hovering over it and clicking on the scissors icon.
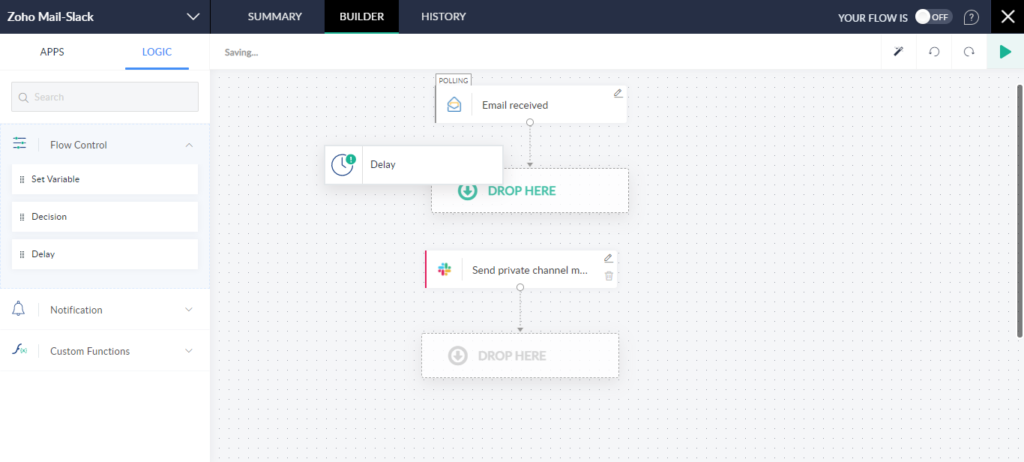
Create a logic-based action
1. Click “Logic” on the left corner, and you can choose flow control, notification, or a custom function.
Flow Control has three logic-based actions.
Set Variable: Assign a result of a formula or a constant value to a variable.
Decision: Actions are executed based on specified conditions.
Delay: Delay the execution of a task as per your requirements.
2. Drag and drop a logic element, in this case, delay, based on when you want it to be executed.
3. Enter the duration (in the given format) or delay until date and click “Done”.
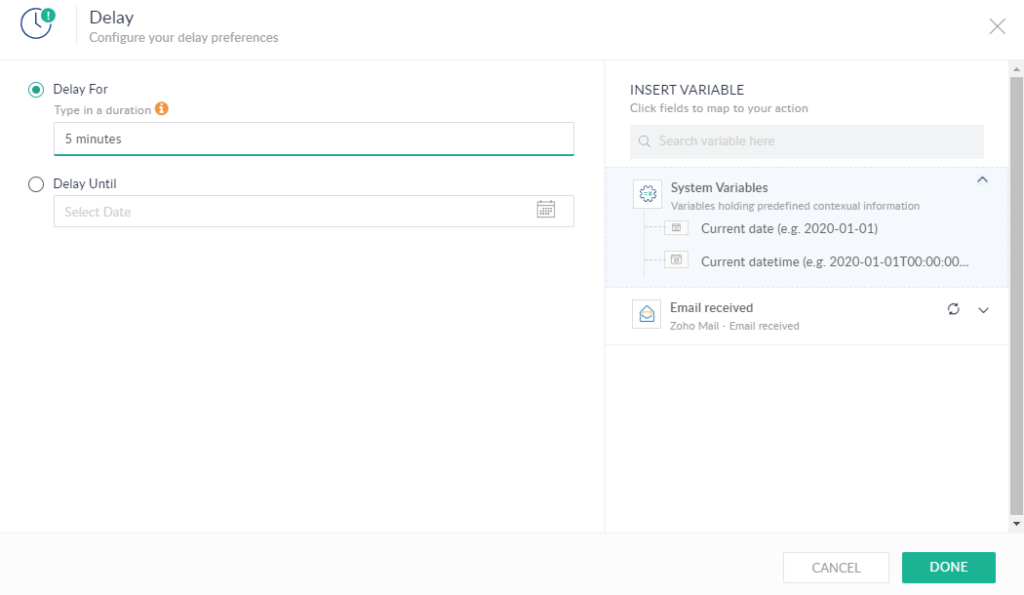
4. Save it after you have completed creating the flow
Test and Debug
It is essential to ensure the workflow is executing without errors.
1. Click on the Test and Debug icon on the right corner.
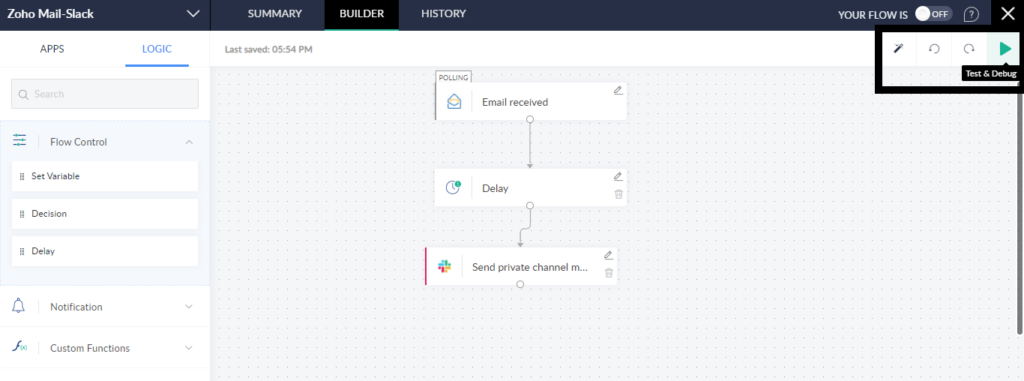
2. Click on “Test” to use the sample data to test the flow.
3. Check input and output to see if the data has transferred properly.
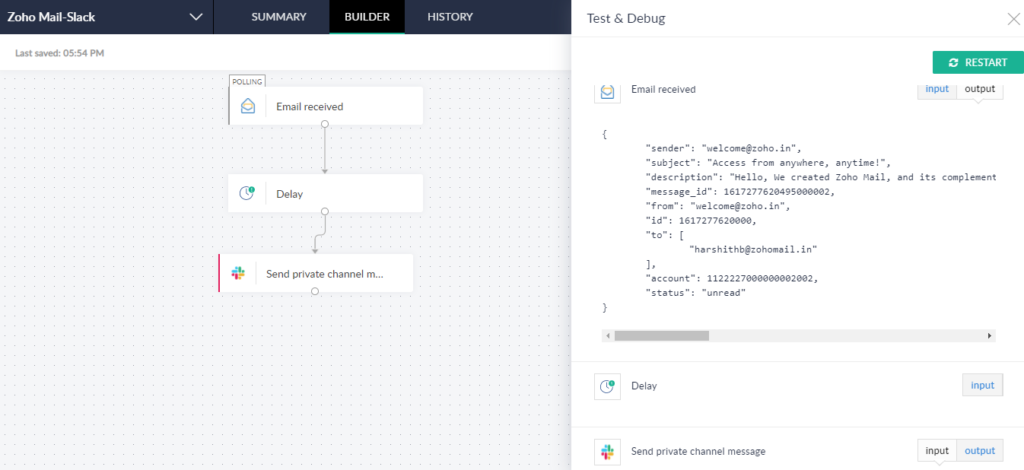
4. If you face a problem, make the necessary changes, and test your flow again.
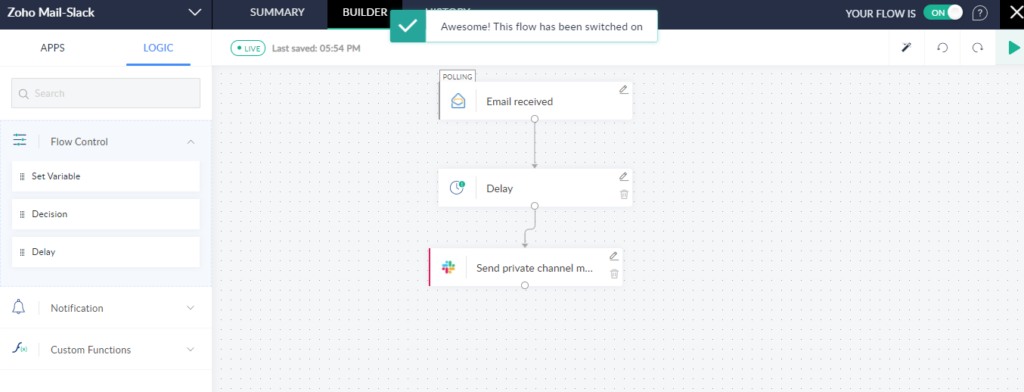
If the workflow is functioning well, switch on the flow in the upper right corner to implement it.
Note: If you are not sure where to start, you can always use the pre-built flows in the gallery and customize them to your needs.
In the end…
Zoho Flow offers a lot of features to integrate your applications and automate your work properly. There are many triggers, app-based actions, and logic-based actions to customize the workflow to your organization’s needs. If you face any difficulties, this guide hopefully provides a quick and thorough guide on creating a workflow. For additional information, you can consult the tutorials and user guides offered by Zoho.
Also Read>>>Beginner’s Guide to Studio Ninja: Best CRM for Photographers
FAQs
What apps can I connect to on Zoho Flow?
You can connect to all the Zoho apps and over 500 third party apps.
How many triggers and actions can I have in my workflow?
You can have one trigger and any number of actions in your workflow.
How much does Zoho Flow cost?
You have two plans to choose from, Standard (500/month/org) and Professional (1250/month/org).