
If you are a professional photographer, this is a question for you. How much of your time do you spend booking and managing customers?
Whatever may be your answer, it can be cut down drastically with Studio Ninja. It is the perfect solution for busy photographers who don’t have the time or skills to tackle administrative tasks.
In this post, you will find everything you need to know about setting up and using Studio Ninja.
Contents
What is Studio Ninja?
Studio Ninja is an end-to-end client management software designed specifically for professional photographers. There are many customer relationship management software solutions, from Salesforce to Zoho, for businesses. But Studio Ninja is a CRM platform built to suit the needs of photographers by photographers.
Studio Ninja functions as both your salesperson and personal assistant.
How does it help you?
The extremely user-friendly interface has made Studio Ninja very popular among photographers. It takes less than 30 minutes to set up, which we will cover later in the post.
It will help you keep track of your jobs, leads, shoots, and payments. As a result, you will increase your bookings. As your business grows, Studio Ninja will help you manage your clients and jobs.
You can connect different applications like Gmail, PayPal, and QuickBooks with Studio Ninja to help manage them from a single platform.
It is the perfect platform to cut down the administrative and business tasks and spend more time doing what you love. It is available in the form of a mobile app, making it easier to keep track on the go.
Since they offer a free trial for 30 days, you can test the platform before committing to it.
What are its features?
- Embedding the Studio Ninja contact form on your website or using it on social media to gain and track leads.
- Converting leads into customers by automatically sending emails for all the website inquiries.
- Keeping track of all your jobs and tasks’ progress and status, all on a single screen for easy visibility.
- Using pre-built customizable workflows as a checklist or for automating routine tasks to increase productivity and save time.
- Setting up a client portal to streamline the process of accepting quotes and making payments easy for your customers.
- Accepting online payments and tracking revenue and income without having to use spreadsheets.
- Integrating all your applications in a single platform to seamlessly exchange data.
Define: Lead is a person or company that has shown interest in your product or services, in this case, photography, and has the potential to become a customer.
How to set up Studio Ninja?
You can try Studio Ninja for free before you buy a subscription. Fill in your business details and verify your email address to sign up for Studio Ninja. Once you sign in, you will be taken to your dashboard.
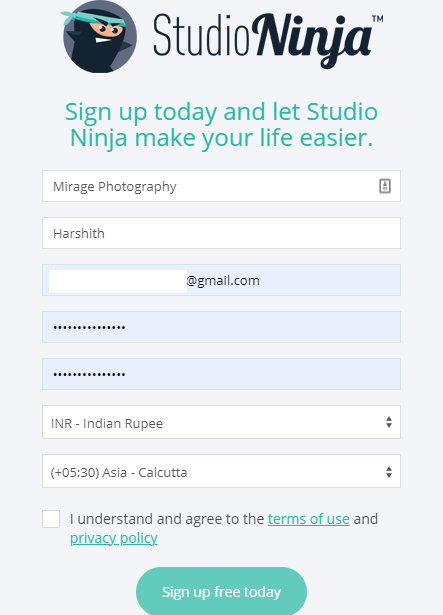
You can add more than one company to your account, depending on your subscription plan. You have two plans to choose from Pro Annual ($191.37/yr) and Master Annual ($241.65/yr).

How to use Studio Ninja?
After setting up your Studio Ninja account, you need to go through your settings and customize them for your needs. Click on “Settings” in the navigation bar, and you will see there are two types, global and company settings.
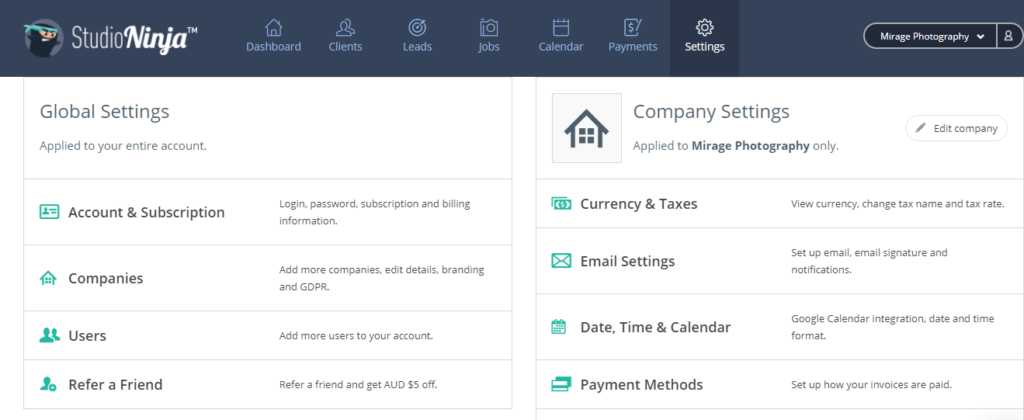
Global Settings
Account and Subscription: You can change your account details, payment details and subscription plans.
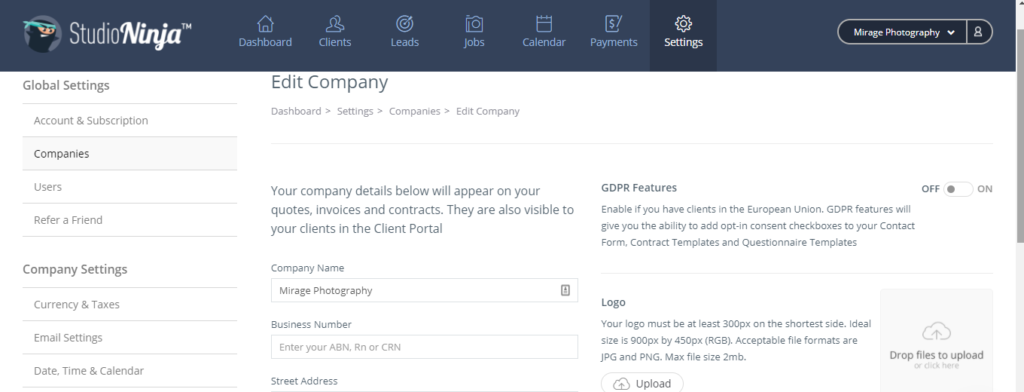
Companies: You can add company and edit details like company name, contact information, logo, and banner.
Users: Invite and add more company user to the account.
Company Settings
Currency and Taxes: Choose a currency and add tax details for your invoices. These settings can not be changed later.
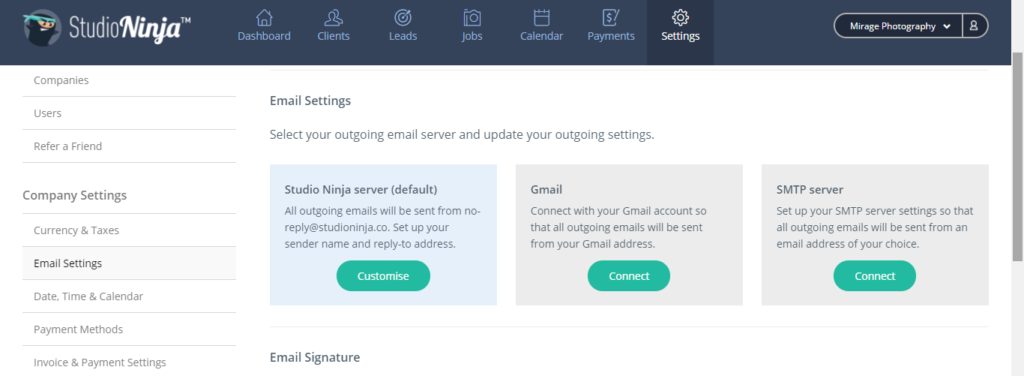
Email: Select the outgoing email server from Studio Ninja (default), Gmail, or your domain’s email. You can also set up your email signature.
Date, Time, and Calendar: Sync Studio Ninja with your Google calendar.
Payment Methods: Select different payment options like credit card and bank transfer for clients using Stripe or PayPal.
Invoice and Payment Settings: Set up payment schedules, reminders, and receipts for your clients. Decide what percent of the payment is due when concerning the shoot.

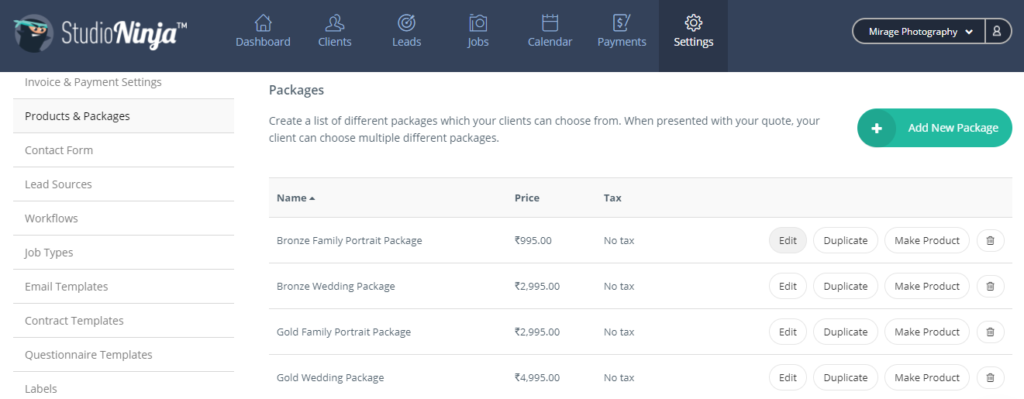
Products and Packages: Create photography packages with unique names, prices, and features. You can also create add-on products and discounts.
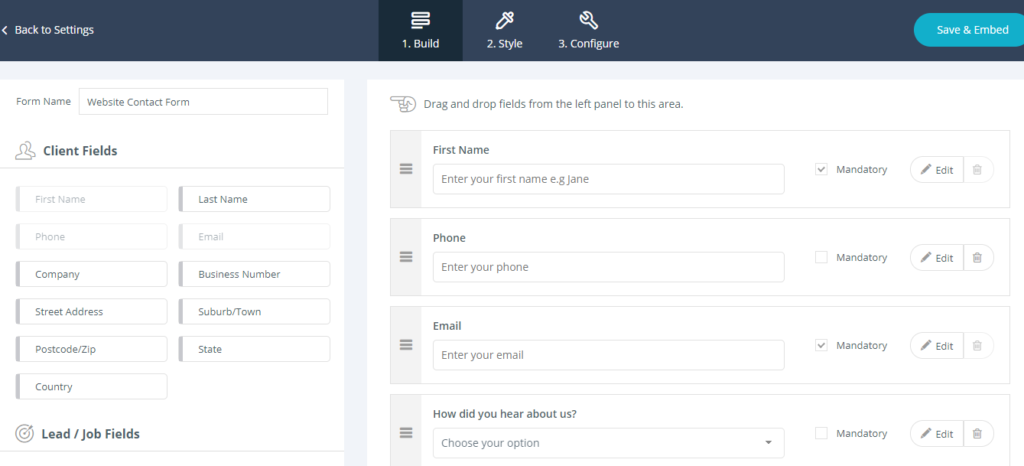
Contact Forms: Build, style, and configure contact forms and embed them on to tour website. When someone fills the contact form, Studio Ninja automatically adds a new client and lead.
Lead Sources: You can add lead sources that you want to track and assign them colors.
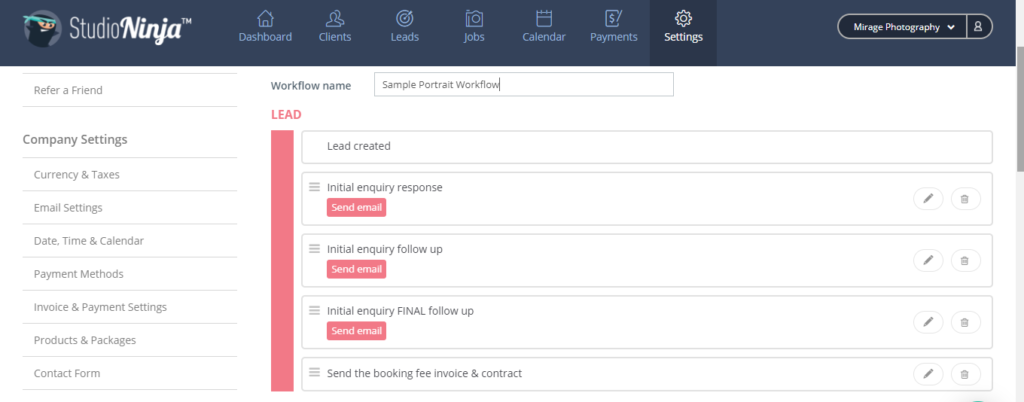
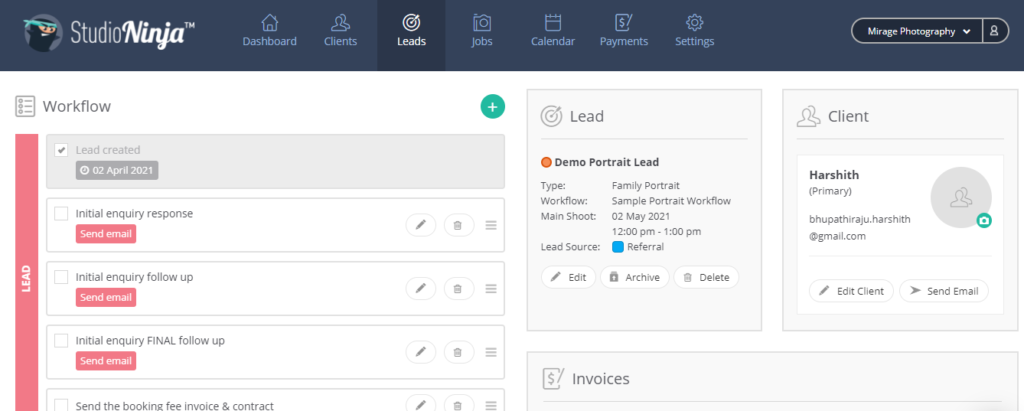
Workflows: Create workflows from lead creation to delivery of services to the client. Workflows can be used to track your progress and to automate tasks like sending confirmation or reminder emails.
Job Types: Customize job types, link them to specific workflows, and assign them unique colors to manage them.
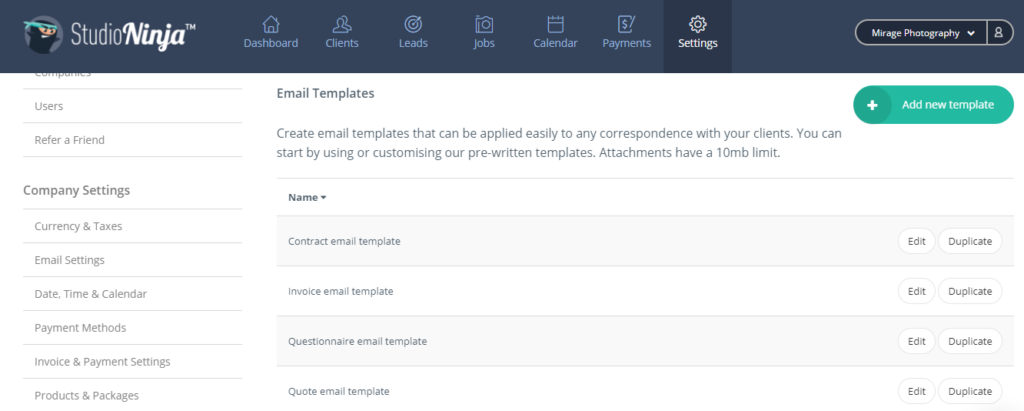
Email Templates: Create different email templates, from a contract email to payment reminder emails, for different workflow tasks.
Contract Templates: Create and customize contracts that clients can sign electronically.
Integrations: Connect all the applications and tools you use to Studio Ninja for seamless exchange of data.
You can change settings later while working on jobs as per requirements. Before you start a job, you should be aware of other sections of the navigation bar of Studio Ninja.
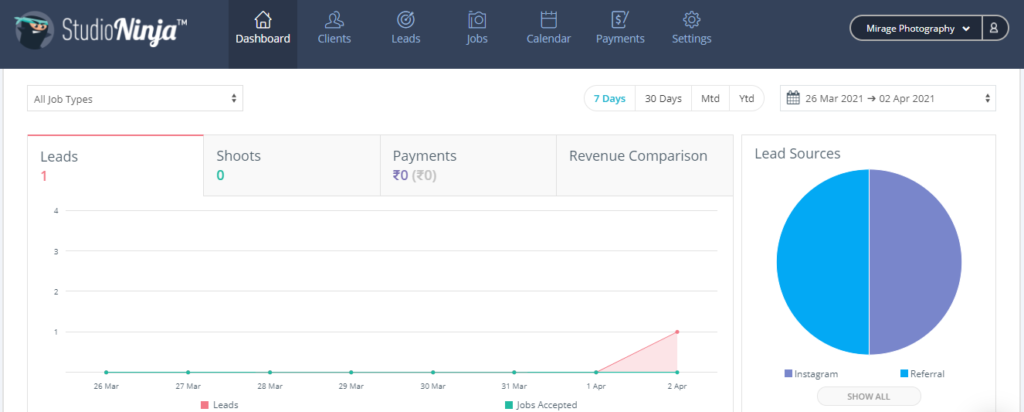
Dashboard: Your dashboard summarizes all the jobs and tasks in progress and those that have been completed. You can filter the dashboard based on job type, dates, and duration. The dashboard provides details about new leads, lead sources, deadlines for shoots, payments due, and revenue.
Clients: It stores all the information about your current clients. You can add and track client information like job details, invoices, emails, etc.
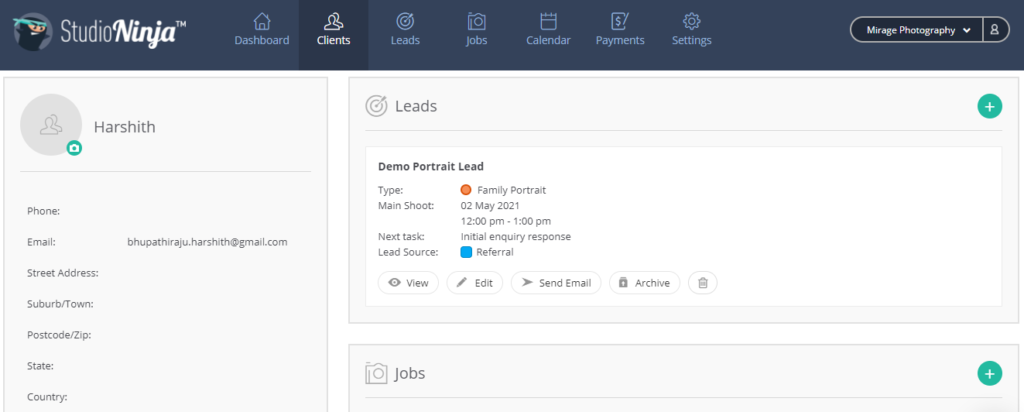
Leads: It stores all the information about current leads. You can add and track the lead’s information like client details, workflow, invoices, quotes, contracts, etc.
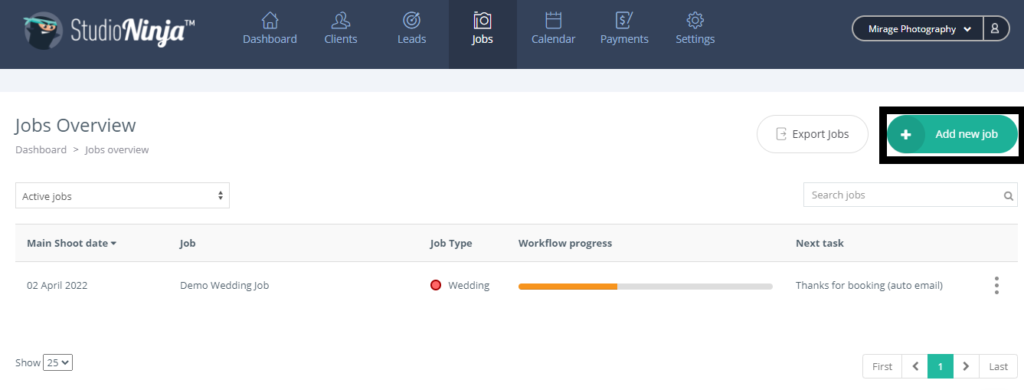
Jobs: It stores all the information about current jobs. You can add and track and job information like client details, workflow, invoices, quotes, contracts, etc.
Note: Once a person or company enquires about your services by filling in a contact form, making a call, etc., he becomes a lead. A lead converts to a job after the client has signed your contract and officially hired you.
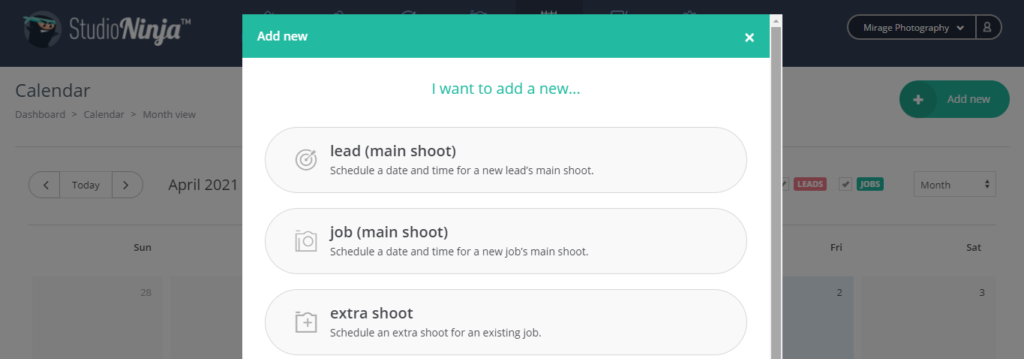
Calendar: You can add and monitor the date and time of the lead and job shoots, appointments, etc.
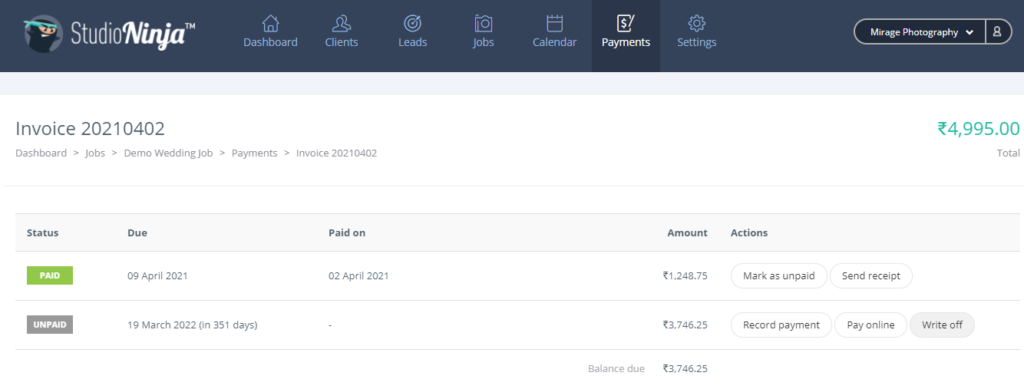
Payments: You can track, record, and make payments in this section. You also have the option of writing off payments.
How to create a job in Studio Ninja?
A job is nothing but a shoot. It contains all the information you need for a shoot, client info, dates, quotes, contracts, etc.
There are a lot of ways to create a new job.
1. Go to “Jobs” in the navigation bar and click on “Add new job” to create one.
2. Fill in the job details in the lightbox pop up.
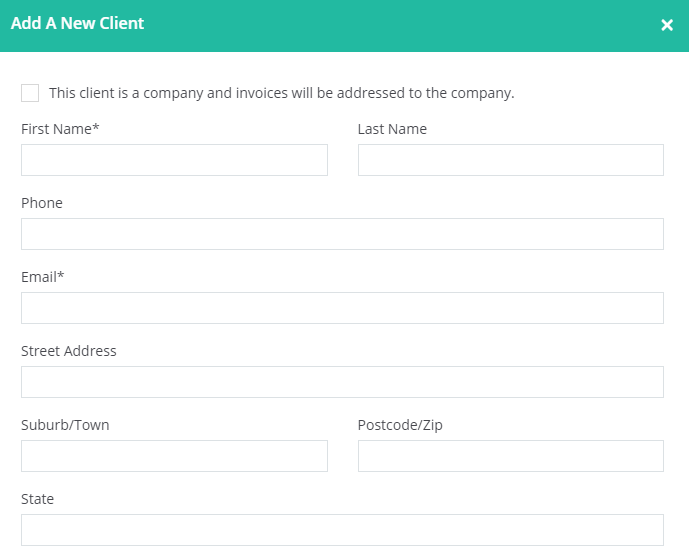
3. Choose from existing clients or click on “Add new client” to add contact details.
4. Then add job details like name, type, workflow, and lead source.
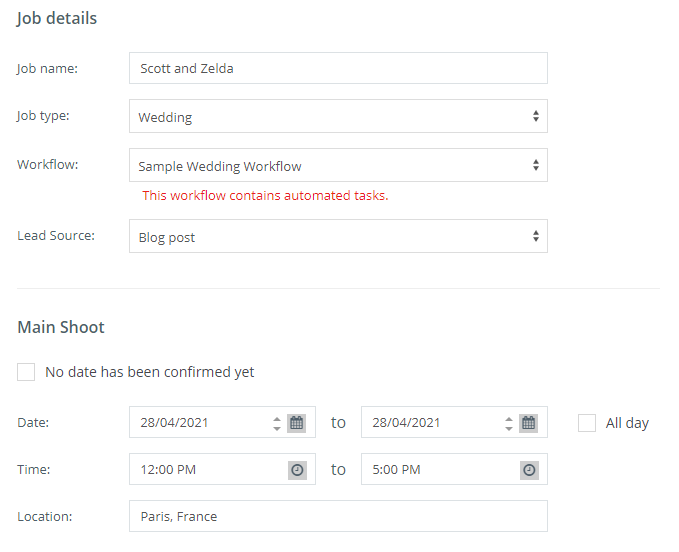
5. Add date, time, and location of the shoot and save the job.
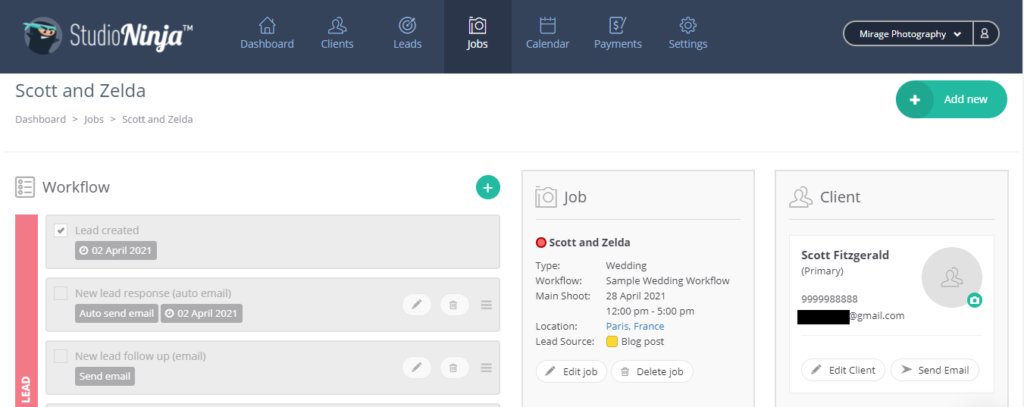
6. A job has been created and you will be taken to the job profile page with all the information you have entered.
You can create new quotes, invoices, contracts, questionnaires, and emails. Just click on the Add New Quote/Invoice/Contract and fill in the details to create them. You can always edit the workflow. You can send automated emails and create due dates for tasks to manage your clients.
In the end…
Studio Ninja offers a lot of great functionalities to the photographer for managing their customers. This post hopefully works as a primer for people looking to use Studio ninja as their CRM tool. It is very intuitive and anticipates all the problems and needs of photographers to deliver a user-friendly platform. So, don’t be afraid to play around and test the platform to see if it suits your needs.
FAQs
How much does Studio Ninja cost?
You have two plans to choose from Pro Annual ($191.37/yr) and Master Annual ($241.65/yr).
What is Studio Ninja?
Studio Ninja is an end-to-end client management software for photographers.
Are there any alternatives to Studio Ninja?
Yes, there are a few like Honeybook, Dubsado, etc.